Setup help
Adding an extension to Claude
The Steps for Claude button on an extension’s page takes you to the right part below. Claude Code in the terminal is at the bottom.
Using ChatGPT? See the steps for ChatGPT.
Checked on
From Claude Marketplace
Adding a connector from Claude Marketplace
- Where to add it
- On claude.ai or in the Claude app on your computer.
- Where it works
- Everywhere you sign in with the same account: on the website, in the apps on your phone and computer, and in Claude Code.
Working in the terminal? Read Claude Code.
Some services have an extension of their own in Claude Marketplace or ChatGPT Plugins. You look the service up and add it with one button. Not every service is in both.
- Open Customize in the menu on the left and choose Connectors at the top.
- On the Discover tab, type the service’s name in the search field at the top right.
- Click the service’s name. Its page opens.
- Click Connect to Claude at the top right. On the page at claude.com, that button is called Add to Claude.
- Sign in to the service if asked.
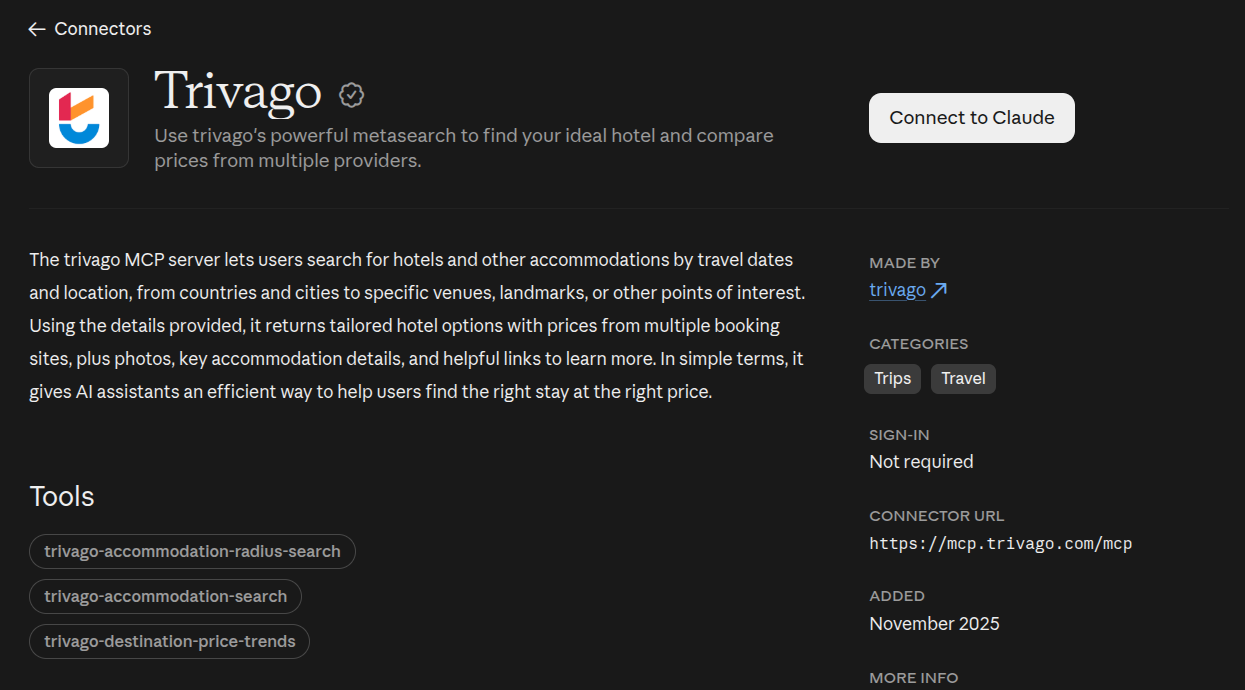
The service isn’t there? Then Claude doesn’t have it. Check on the maker’s page whether it is in ChatGPT.
Done? Then the connector is listed under Connectors on the Yours tab. In a chat, click + in the message box and choose Connectors: it is there with a switch. If the switch is off, turn it on.
- Team: if it says Request, you ask your admin for the connector.
- Sign in to Claude Code with the same Claude account and the connector is there too.
- To remove it again: open Connectors under Customize and pick the connector. Remove is there, in its three-dot menu too.
With an address
Adding a connector with an address
- Where to add it
- On claude.ai or in the Claude app on your computer.
- Where it works
- Everywhere you sign in with the same account: on the website, in the apps on your phone and computer, and in Claude Code.
Working in the terminal? Read Claude Code.
A remote MCP server runs at the maker’s end, on the internet, not on your own computer. You only add its address, so you can do it in your browser. You copy the address from the extension’s page. If it names a service you sign in to there, you need an account at that service.
- Open Customize in the menu on the left and choose Connectors at the top.
- Click Add at the top right and choose Add custom connector.
- Enter a name you will recognise under Name and paste the extension’s address under MCP server URL.
- Click Continue or Add at the bottom right. If a screen about signing in follows, choose how you want to sign in and click Add.
- Sign in to the service if asked.
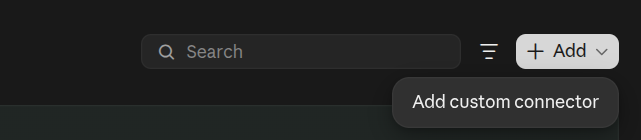
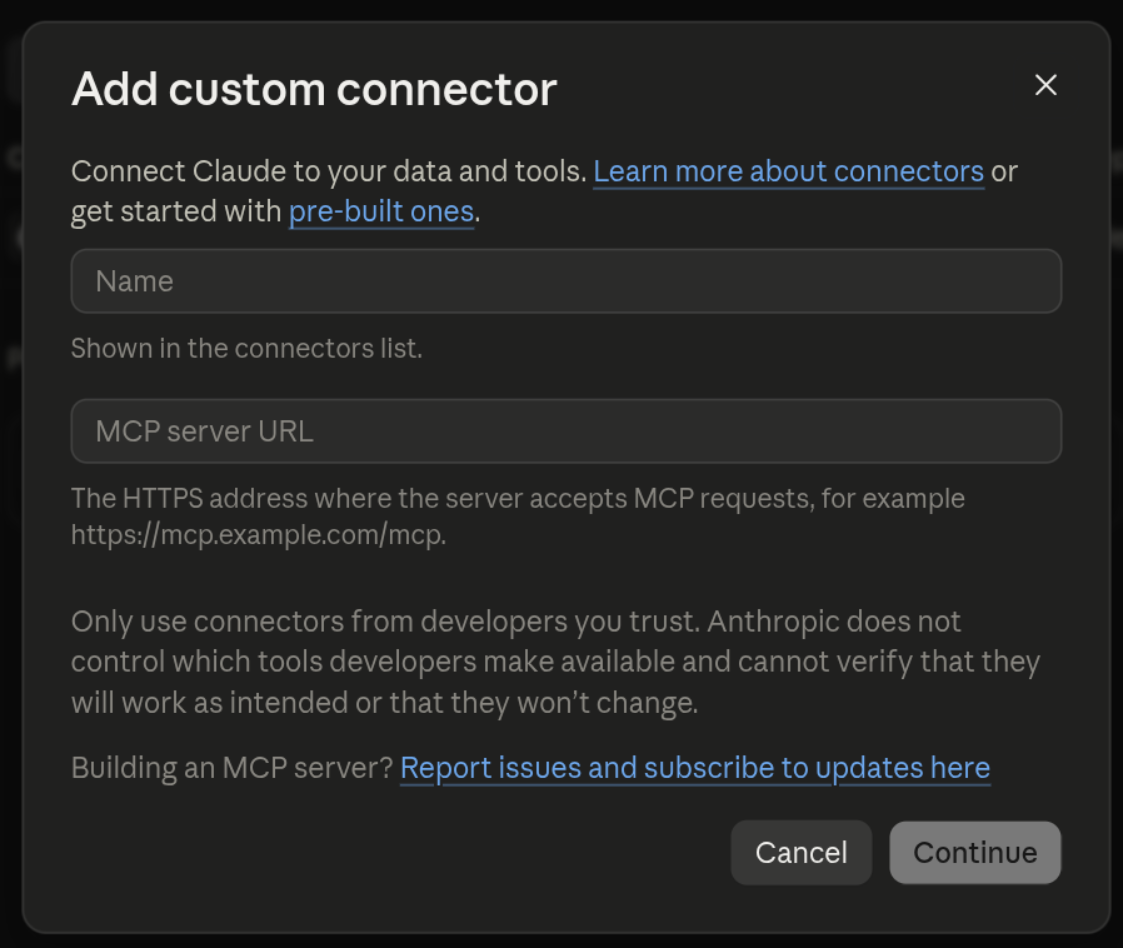
Done? Then the connector is listed under Connectors on the Yours tab. In a chat, click + in the message box and choose Connectors: it is there with a switch. If the switch is off, turn it on. Claude asks for permission the first time: Allow once or Always allow.
- Free: you can add one connector of your own.
- Team and Enterprise: an Owner adds the connector for the organisation first.
- Sign in to Claude Code with the same Claude account and the connector is there too.
- You cannot change your sign-in choice later: remove the connector and add it again instead.
- To remove it again: open Connectors under Customize, pick the connector and click Remove or its three-dot menu.
Does the extension’s page say Local or remote under Runs? Then the same server can also run on your own computer. How that works is in adding a local MCP server.
Local MCP server
Adding a local MCP server
- Where to add it
- In the Claude app on your computer.
- Where it works
- In that app, on that computer.
Working in the terminal? Read Claude Code.
A local MCP server is a program that runs on your own computer. So you add it to an AI on that computer.
Does the maker also provide an MCP address? Follow the steps in adding a connector with an address instead.
There are three ways, from easy to hard. Which one applies to this server, the Go to the maker button shows you.
A desktop extension from Claude itself
Anthropic has reviewed every desktop extension you find here.
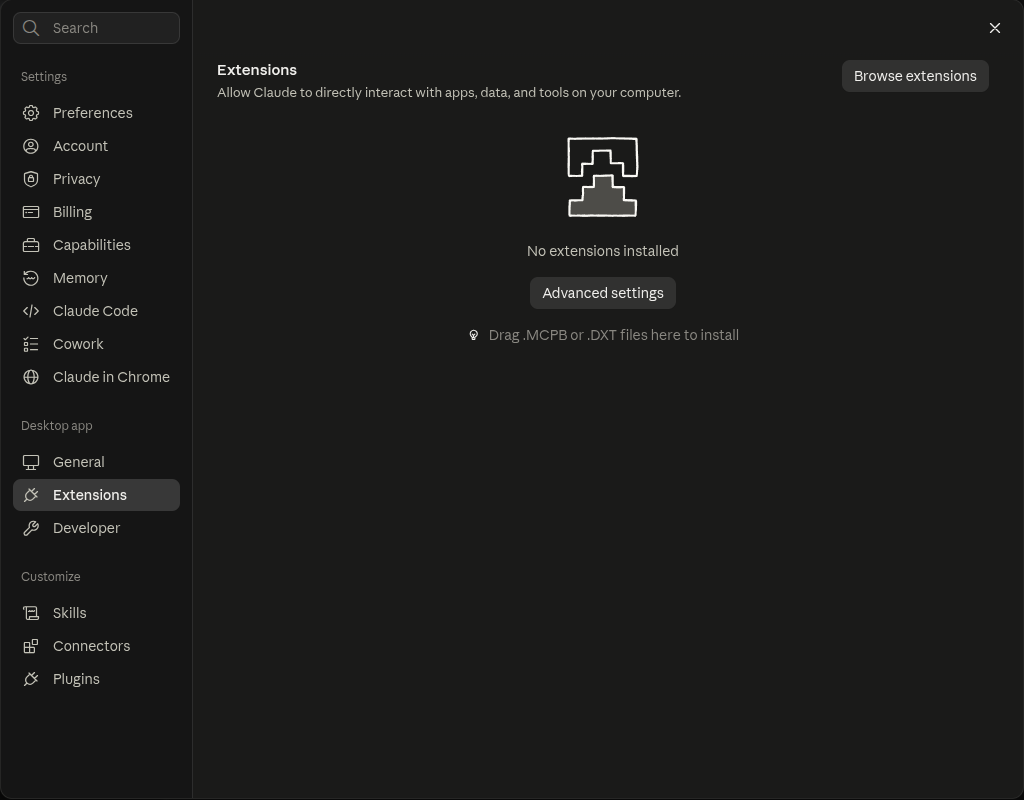
- Open Settings from your name at the bottom left and choose Extensions, under This computer.
- Click Browse extensions and look up the extension.
- Click Install.
- Follow the desktop extension’s prompts and turn it on if asked.
With a file from the maker
If the maker provides a .mcpb file, you add it like this:
- Open Settings and choose Extensions.
- Drag the maker’s file onto this screen, or double-click the file.
- Click Install and confirm.
- Dragging not working? Click Advanced settings and, under Extension developer, choose Install extension.
By hand, in the configuration file
This is the last resort. The command is behind the Go to the maker button. What has to be on your computer first is under Requires on the extension’s page.
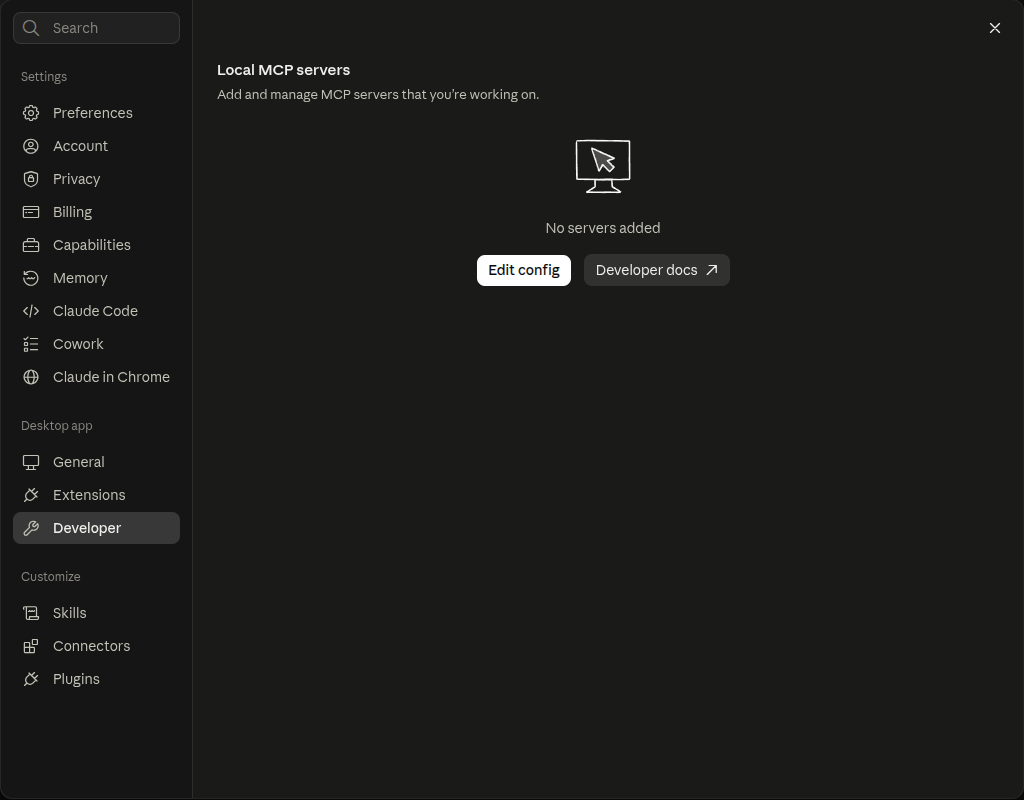
- Open Settings and choose Developer, under This computer.
- Click Edit config. The file
claude_desktop_config.jsonopens. - Put the server in the way the maker describes it for this file, and save.
- Then choose Reload MCP Configuration in the app’s Developer menu, not in Settings. If you don’t see it, quit Claude completely and open the app again.
Skill
Adding a skill
- Where to add it
- On claude.ai or in the Claude app on your computer.
- Where it works
- On the website, on your computer and on your phone.
Working in the terminal? Read Claude Code.
A skill is a set of instructions your AI reads. Nothing is connected and no server runs: it is a folder of text that your AI picks up when your question calls for it. If a skill also ships scripts, your AI runs them itself.
- Open Settings from your name at the bottom left and choose Capabilities.
- Under Code execution and file creation, turn on the Run code in the cloud switch.
- Download the skill from the maker’s page. If the maker provides a ZIP or
.skillfile, use that. If the skill is on GitHub without such a file, click the green Code button and choose Download ZIP. - Open Customize in the menu on the left and choose Skills at the top.
- Click Add at the top right and choose Upload skill.
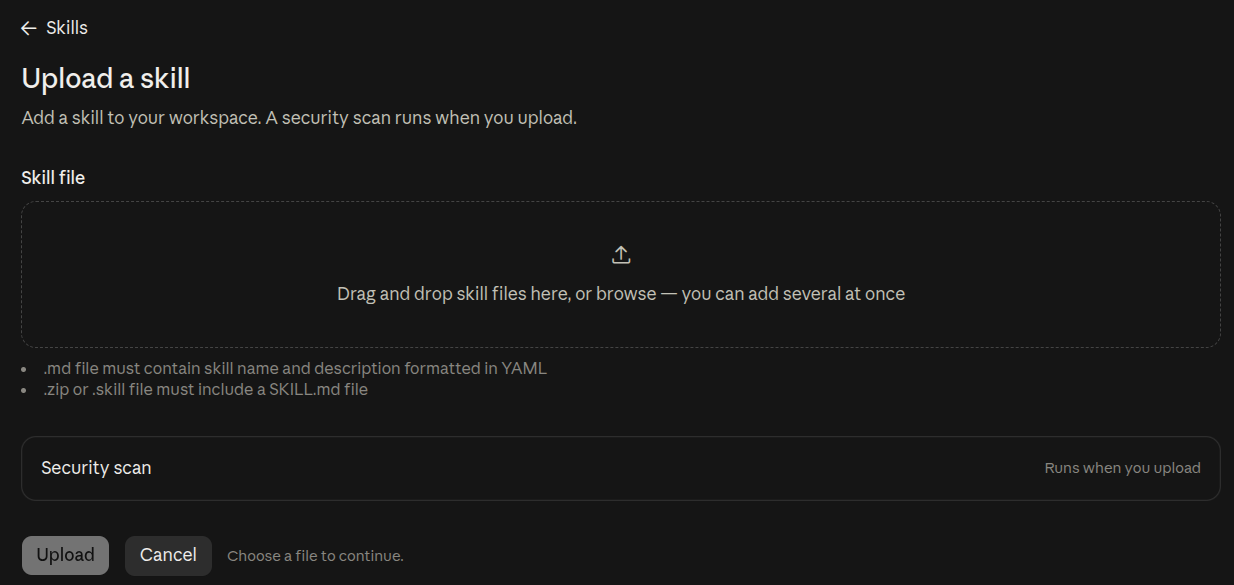
- Drag the file into the box, or click the box to choose it.
- Click Upload.
The ZIP must contain the skill’s folder, with SKILL.md inside it. If the ZIP holds several skills, unzip it and make a ZIP of just the folder you want.
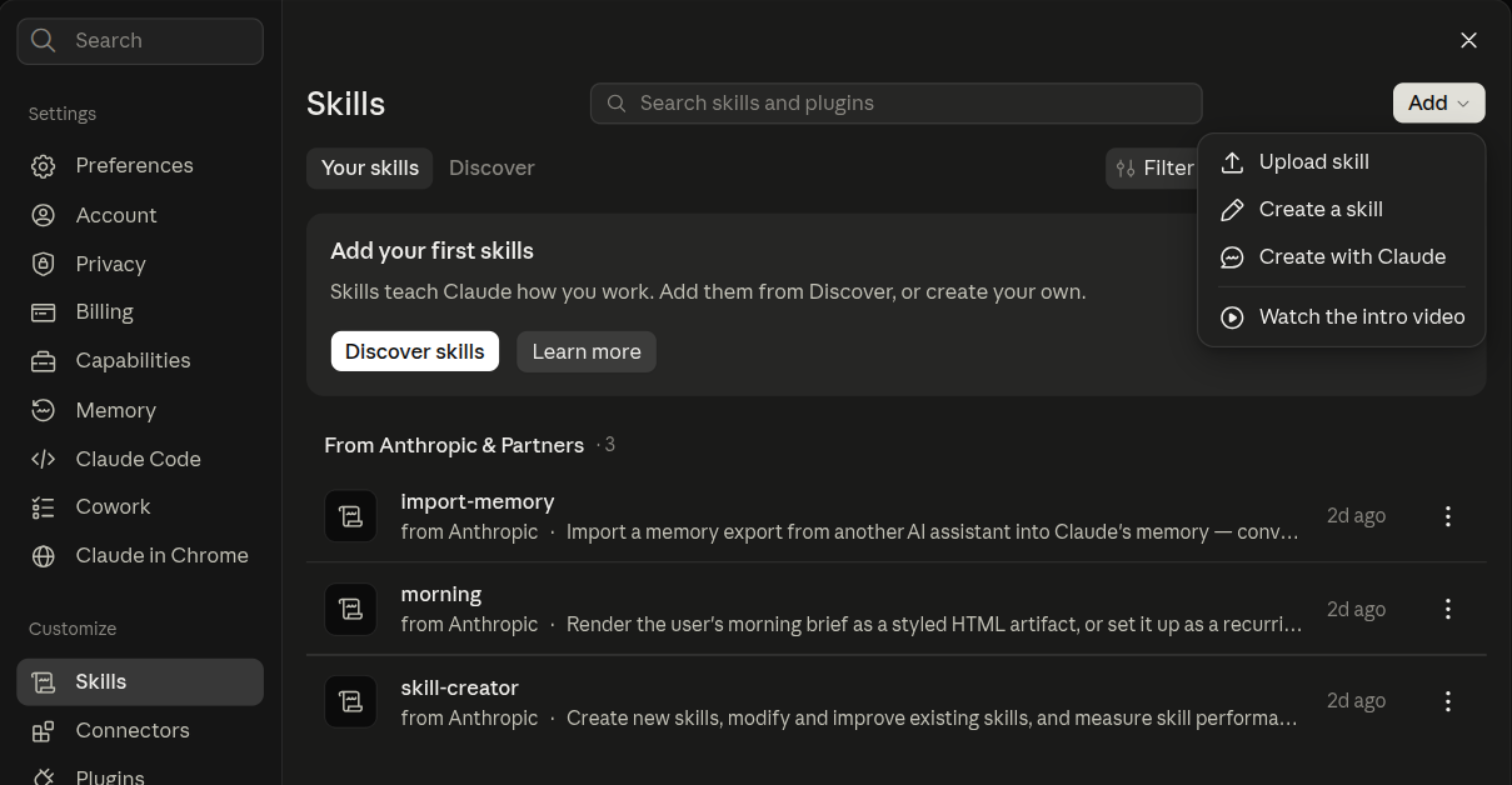
Done? Then the skill is in the list under Skills, with a switch beside it: if it is off, turn it on. Read SKILL.md before you turn it on: a skill does what it says. Claude uses the skill by itself when your question calls for it; you can also pick it by typing / in the message box.
Don’t see Skills under Customize? Then your plan does not include it.
Plugin from a marketplace
Adding a plugin from a marketplace
- Where to add it
- On claude.ai or in the Claude app on your computer.
- Where it works
- The plugin’s skills work on the website and in the apps on your phone and computer. A local MCP server in the plugin works in the app on your computer.
Working in the terminal? Read Claude Code.
A plugin is a bundle from the maker: one or more skills, sometimes with an MCP server too. The maker puts their plugins in a marketplace, a list on GitHub. You first add that marketplace, then pick the plugin. The maker’s page says what the two are called.
You name a marketplace by where it lives on GitHub, in the form owner/repo. That is not always where the plugin itself lives: use what the maker names.
- Open Customize in the menu on the left and choose Plugins at the top.
- Click Add at the top right and choose Add marketplace.
- Choose Add from a repository.
- Under URL, enter the maker’s marketplace as
owner/repoand click Sync. - Find the plugin under Discover and click Add.
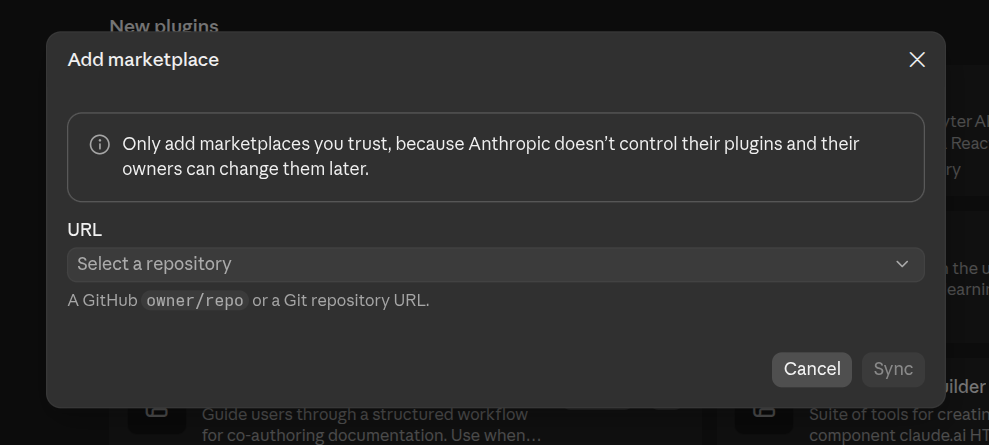
Claude warns you to add only marketplaces you trust. Read on the maker’s page what the plugin does before you add it.
Done? Then Claude uses the plugin’s skills when your question calls for it, and you can also pick them by typing / in the message box.
- Plugins need a paid plan.
- Sign in to Claude Code with the same Claude account and Claude Code picks the plugin up at its next start.
Does the plugin also bring agents or hooks? Not every AI uses those. Check the maker’s instructions for which AI supports the whole bundle.
The maker’s work folder
Opening a work folder
- Where to add it
- In the Claude app on your computer, under Code.
- Where it works
- On that computer, in that folder.
Working in the terminal? Read Claude Code.
A work folder is a maker’s folder you work in with your AI. It holds instructions, and often skills, that your AI reads as soon as you start it in that folder. That works in Claude Code and Codex, in the apps on your computer too.
Read on the maker’s page what the folder does. What has to be on your computer first is under Requires on the extension’s page. Your AI can start programs from the folder on your computer.
- Download the folder from the maker’s page. If it is on GitHub, click the green Code button and choose Download ZIP.
- Unzip it.
- Open the Claude app on your computer and choose Code at the top.
- Below the message box, click the folder choice and choose Open folder….
- Pick the folder you unzipped.
- Type what the maker names first, often a skill that starts with
/.
Working under Code needs a paid plan.
An ordinary chat in the app can use a folder too, through Project or folder below the message box, but it does not read the skills in that folder. So choose Code.
Done? Then Claude reads the maker’s instructions in the folder. Type / in the message box: the work folder’s skills are then in the list.
Claude Code (in the terminal)
Working with Claude Code in the terminal? Then you add every kind of extension with a command or a folder in the right place.
MCP servers and skills you add in Claude Code stay on this computer.
From Claude Marketplace
You add a connector from Claude Marketplace on claude.ai or in the Claude app. Sign in to Claude Code with the same Claude account and it is there too.
Type /mcp in Claude Code to see it. If you sign in with an API key, it isn’t there.
With an address
Copy the MCP address from the extension’s page and run this command in the terminal. Replace NAME with a short name without spaces and ADDRESS with the address:
claude mcp add --transport http NAME ADDRESSThat puts the server in the folder you run the command in only, and for you only. For all your projects, add --scope user:
claude mcp add --transport http NAME --scope user ADDRESSDo not choose --scope project: that puts the server in a .mcp.json in the folder, and that file is shared with your project.
If the service asks for an account, sign in through your browser:
claude mcp login NAMEIf the maker asks for an API key, follow the maker’s instructions. Type /mcp in Claude Code to see whether the server is connected.
To remove it again, stored sign-in included:
claude mcp remove NAMELocal MCP server
What has to be on your computer first is under Requires on the extension’s page. The command is behind the Go to the maker button. Put claude mcp add NAME -- in front of it, with a name of your choice:
claude mcp add NAME -- COMMANDThat puts the server in the folder where you give the command only, and only for you. For all your projects, put --scope user right after claude mcp add: claude mcp add --scope user NAME -- COMMAND.
If the server asks for an account or API key, follow the maker’s instructions. Type /mcp in Claude Code to see whether the server is connected.
To remove it again, with the name you chose:
claude mcp remove NAMESkill
A skill is a folder with a SKILL.md file in it. There is no command to add one: you put the folder in the right place.
- In
~/.claude/skills/for all your projects. - In
.claude/skills/inside a project, for that project only.
Or let Claude Code do it: copy the link to the maker’s page, paste this request and replace SOURCE_LINK with that link. Claude Code first asks whether the skill goes in this folder only or in all your projects.
Add the skill from SOURCE_LINK following the maker’s instructions. First ask which skill and where: this folder or all my projects. Give me the skill name.Type /skills in Claude Code to see whether the skill is listed.
If the maker ships the skill as a plugin, follow the steps for a plugin from a marketplace.
Removing it is deleting the folder again.
Plugin from a marketplace
First add the maker’s marketplace, with OWNER/REPO as the maker names it:
claude plugin marketplace add OWNER/REPOThen the plugin, with the plugin’s name and the marketplace’s. You see the marketplace’s name with claude plugin marketplace list:
claude plugin install PLUGIN@MARKETPLACEOr both in one command:
claude plugin install PLUGIN --marketplace OWNER/REPOThat puts the plugin in all your projects; with --scope local in this folder only. It takes effect after a restart or /reload-plugins.
To remove it again:
claude plugin uninstall PLUGIN@MARKETPLACEThe maker’s work folder
Get the folder the way the maker describes, go into it and start Claude Code. Replace FOLDER with that folder’s name:
cd FOLDER
claude
Claude Code then reads that folder’s CLAUDE.md, or its AGENTS.md if there is no CLAUDE.md, and the skills in its .claude/skills/. Type / to see them.